MySQL Workbench is an integrated development environment used by DBAs and developers when working with MySQL servers and databases. There are three main areas of functionality: SQL Development, Data Modeling, and Server Administration. This article will show you how to use the Server Administration tool to create a backup for your database.
How to Use the Server Administration Tool in MySQL Workbench
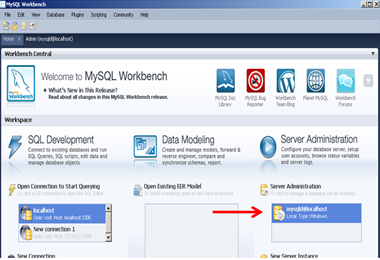
To create a backup, launch MySQL Workbench. Within the Server Administration component, connect to your database.
The list of MySQL Workbench Server Administration tools will be shown. Choose the tab for Data Dump
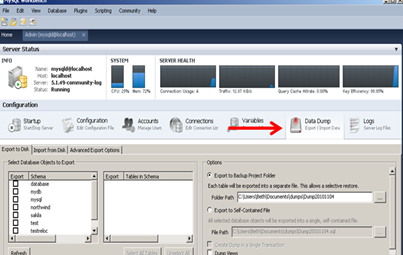
Within this Data Dump tool, you can backup specific databases or individual tables.
Creating a Backup for a Single Database
First, here are the steps to create a backup for a single database.
-
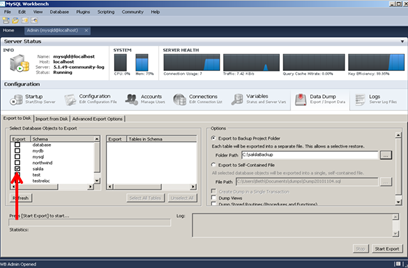
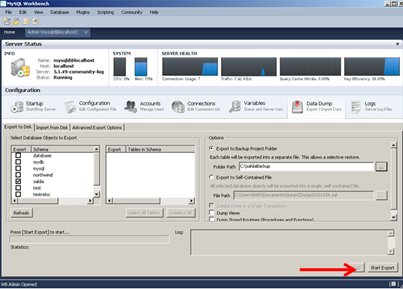
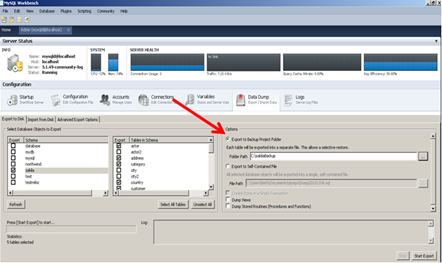
Choose the database you wish to backup by clicking on the checkbox beside it.
-
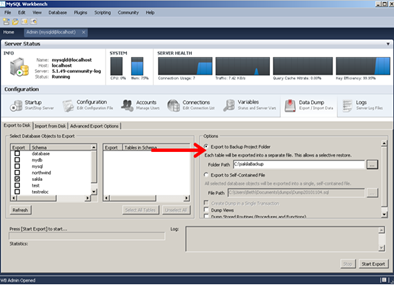
Next, specify the destination file of your backup. MySQL Workbench has the advanced feature of letting you decide whether to Export to a Backup Project Folder (each exported table will be written to a separate file) or to Export to Self-Contained File (all exported database objects will be written to a single file). In addition, you can enter the full path name where you want the server to create the file(s).
-
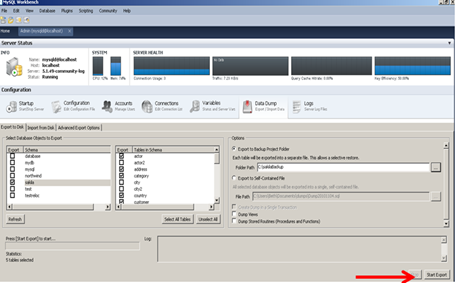
Start the backup process by clicking on the Start Export Button. MySQL Workbench will show you the progress of the activity.
-
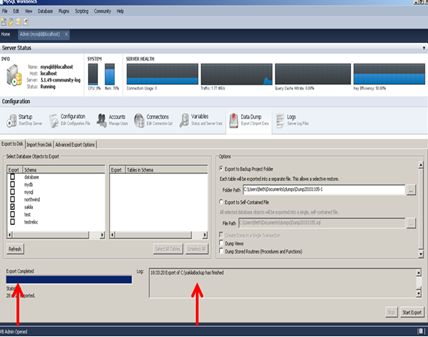
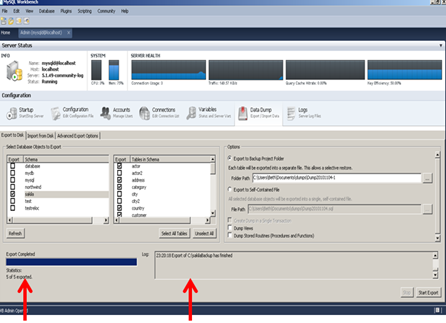
Finally, MySQL Workbench displays a message whether it has completed the backup or not. Check the logs and take appropriate actions if there are errors.
Creating a Backup for Individual Tables
MySQL Workbench gives you the option to backup individual tables.
-
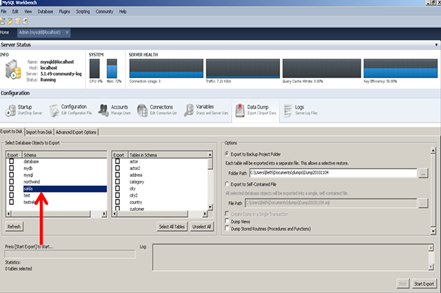
To do that, click on the name of the database which contains the table(s) you wish to backup. Note that the tables contained within the database you chose will be displayed on the middle portion of the screen.
-
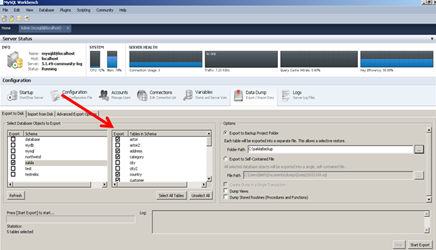
From the list of tables, choose those for backup by clicking on the checkboxes.
-
As before, indicate the destination of the backup file. You can choose the default destination or enter a full pathname.
-
Once again, click on the Start Export button to start the backup process.
-
After the tables have been exported, MySQL Workbench will display a message regarding the completion of the process. Check the logs and take appropriate actions if there are errors.
Article ID: 23, Created: June 27, 2012 at 12:50 AM, Modified: June 27, 2012 at 2:47 AM