This how-to will step you through generating a certificate signing request (CSR) in IIS. These procedures were tested in Windows 10 on IIS 10, but will also work in IIS 7.x and 8.x.
- Start IIS Manager.
Start IIS Manager. One quick way to do this is by opening the Run command, then typing inetmgr and clicking the OK button. 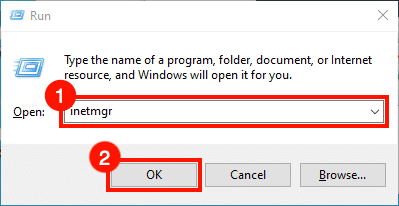
- Select server.
Select the server in the Connections pane, on the left side of the window.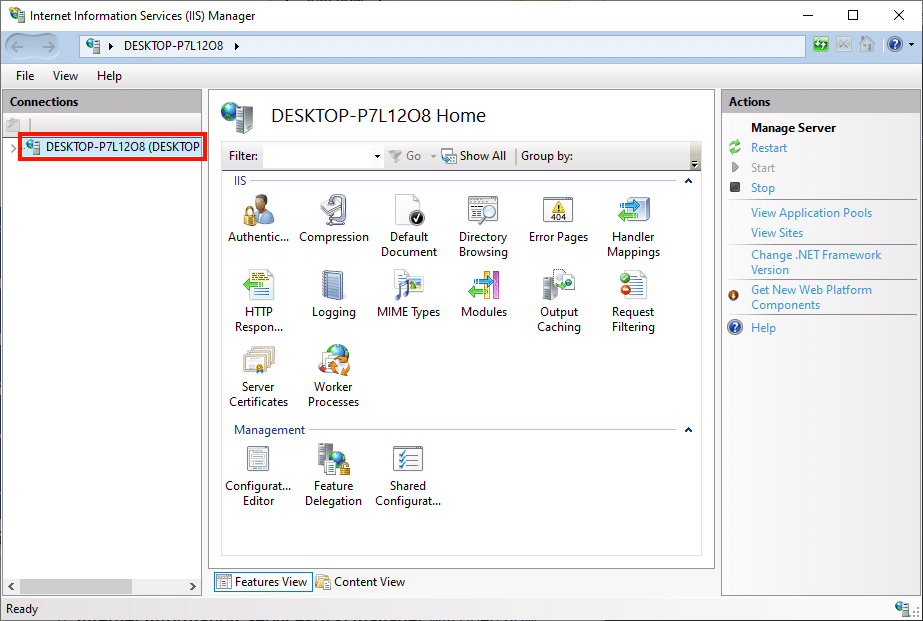
- Open Server Certificates.
Double-click the Server Certificates icon, located under IIS in the center pane of the window.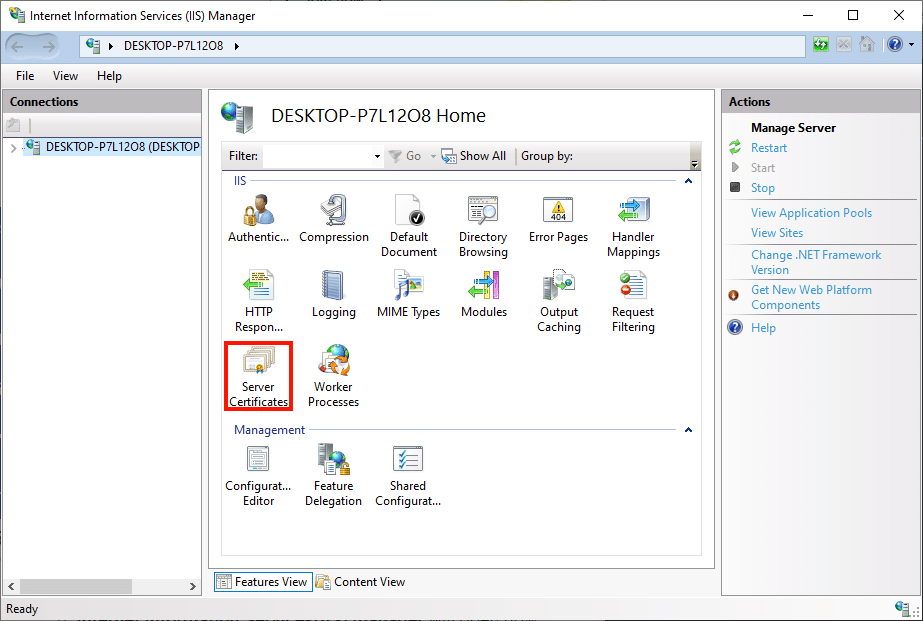
- Click “Create Certificate Request.”
Click the Create Certificate Request… link, in the Actions pane on the right side of the window.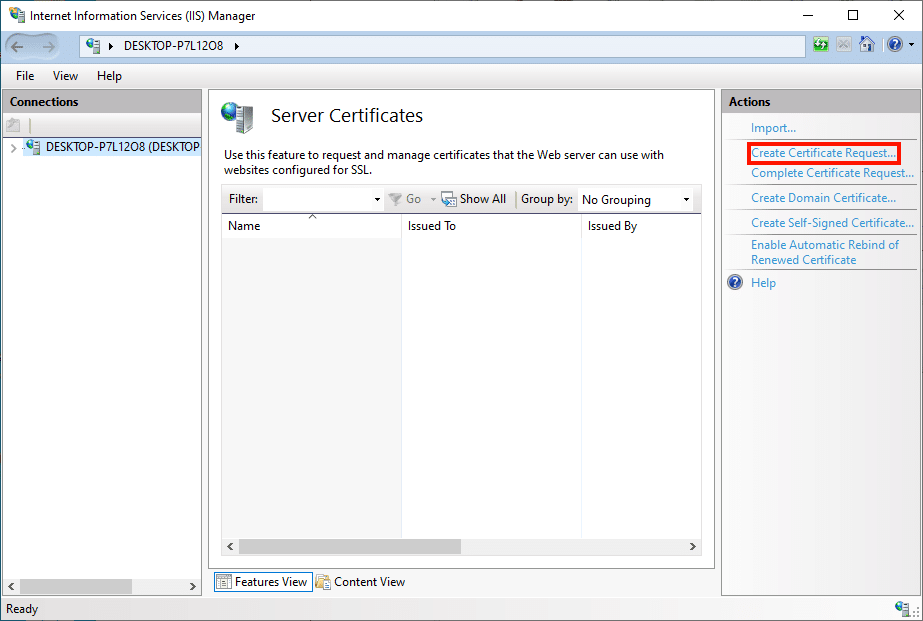
- Enter Distinguished Name Properties.
The Request Certificate wizard will open. Fill out the Distinguished Name Properties form with the following information:
• Common Name: The hostname that will use the certificate. This is usually a fully-qualified domain name, like www.mydomain.com, or store.mydomain.com. You can also use a wildcard, like *.mydomain.com.
• Organization: The legal name of your company or organization.
• Organizational Unit: The departmental or division name for your group.
• City/locality: The city where your company is located.
• State/province: The state where your company is located.
• Country/region: Please use the two-character abbreviation for your country.
When you are finished filling out the form, click the Next button. 
- Set Cryptographic Service Provider Properties.
Next, set the Cryptographic Service Provider Properties. Use the drop-down menus to select Microsoft RSA SChannel Cryptographic Provider as the cryptographic service provider, and a bit length of 2048 (unless you have a reason to set these to other values). When you are finished, click the Next button.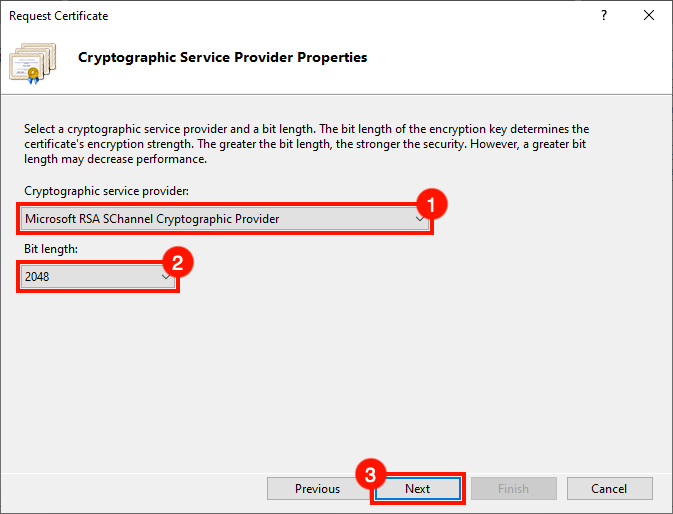
- Create file name and finish.
Create a file name for your CSR, then click the Finish button. 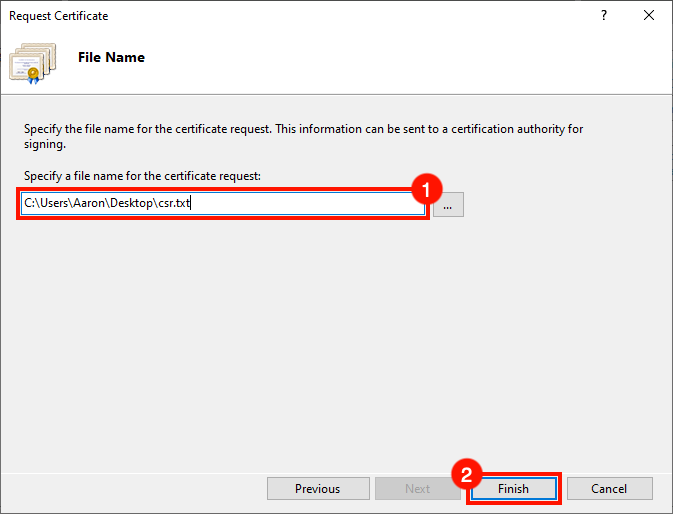
- Next steps.
Please open the CSR in a text editor, then copy and submit it to your SSL provider to issue the SSL certificate. 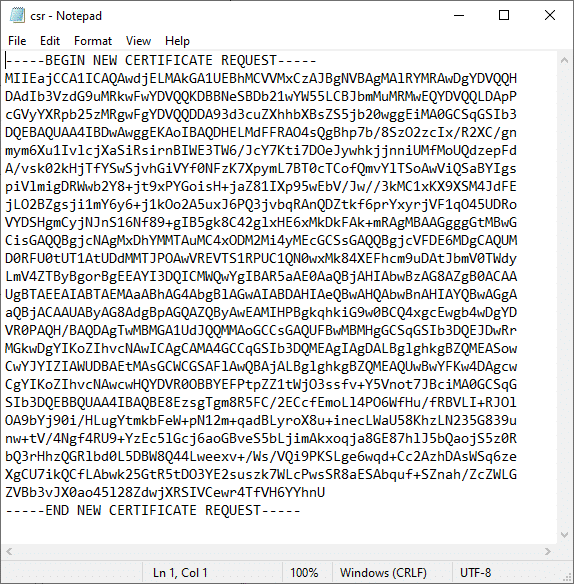
Article ID: 2136, Created: April 11, 2021 at 10:26 PM, Modified: April 13, 2021 at 9:00 PM