Method 1. Auto backup SQL database via Maintenance Plan
A maintenance plan creates a workflow of the tasks to maintain you database. You can also use it for regular backup.
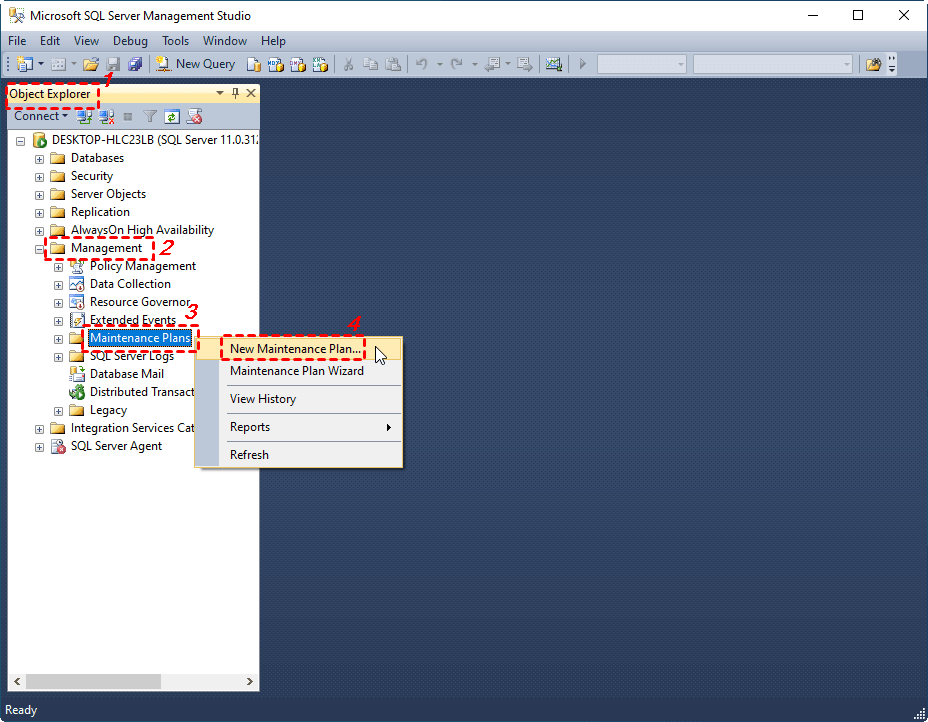
1. Launch SSMS and connect to your server. Expand Management menu under an instance, then right-click Maintenance Plans to create New Maintenance Plan, or open Maintenance Plan Wizard. They are essentially the same, but the wizard will lead you through the whole operation. Here I will choose the former as an example.
2. You will be asked to give a name to this plan. After confirmation, you can click Toolbox on the left side and drag Back Up Database Task to the lower part of MaintenancePlan window.
3. Double-click the generated task, you can configure it in the pop-up window. First, choose Backup type from “Full”, “Differential” and “Transaction Log”. Then select one or more Databases(s) to backup. Click OK to confirm it. If you selected more than one database, you can also choose to Create a backup file for every database if you want.
- Full backup includes all database objects, system tables, data, and transactions that occur during the backup.
- Differential backup includes the data that has changed and transactions that occur during the backup process since the last full backup.
- Transaction log backup includes transactions that have occurred on a database since the previous transaction log backup and then truncates the transaction log and then truncates a transaction log. A transaction log backup ensures database recovery to a specific point of time e.g. to a moment prior to data loss.
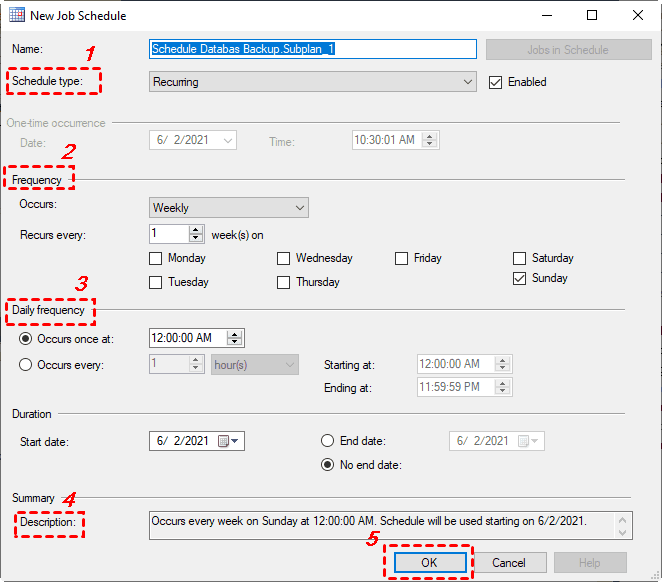
4. Now you can click on the calendar icon, namely Subplan Schedule to automate the database backup task. For a time based schedule, you can keep the selection of “Recurring” as the Schedule type, and further configure the frequency and duration. Alternatively, you can also make the task “Start automatically when SQL Server Agent starts”, or “Start whenever the CPUs become idle”.
5. Save the changes and now you’ve set up the SQL Server automatic backup. You can then find the task under SQL Server Agent and all your backups will be made according to the specified schedule.
Method 2. Create scheduled job to backup database with SQL Server Agent
SQL Server Agent is a service that executes scheduled administrative jobs. Each job contains one or more job steps, and each step contains its own task, database backup, for example.
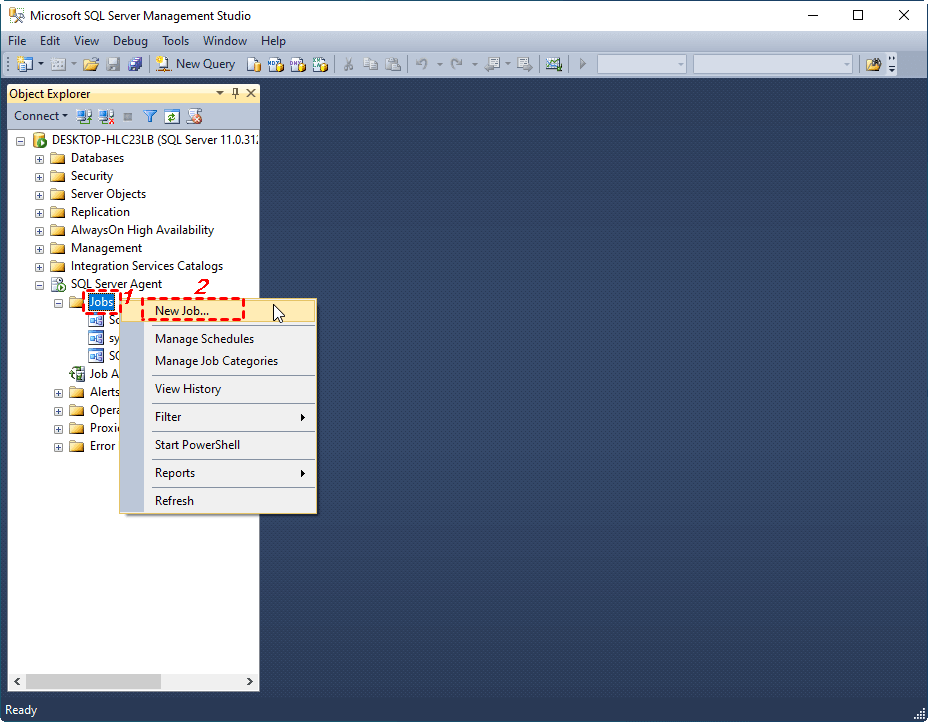
1. To use it, launch SSMS and connect to your instance. Make sure the SQL Server Agent is enabled. If not, right-click it and Start it. Then, choose New > Job from the right-click menu.
2. The New Job window will pop out. You can type its “Name” and “Description” in General tab.
3. Then move to Steps tab, click New at the left-bottom corner to configure it. First make sure the Type is “Transact-SQL script (T-SQL)”, and choose Database as “master”. Then you can enter the command to perform backup.
The basic command for database backup was like:
BACKUP DATABASE example
TO DISK = 'D:\SQL Server\example.bak';
You just need to replace the database name and file path as you need. If you want to do differential backup for the database(s), you can add a line of “WITH DIFFERENTIAL”. But please note a full backup must be created beforehand.
To backup transaction log, just replace the “DATABASE” with “LOG” in the command:
BACKUP LOG example
TO DISK = 'D:\SQL Server\example.trn';
Click OK to confirm the command and then move to Schedule tab.
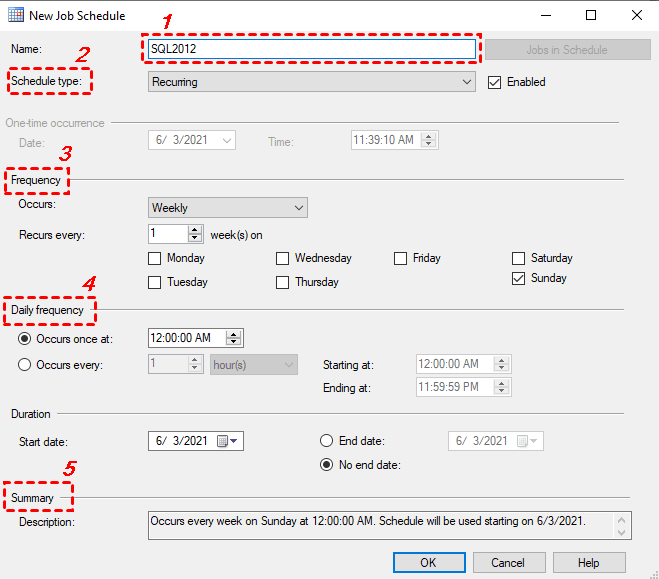
4. Similarly, click New to create a new schedule. You can give it a name, choose a schedule type and configure the frequency as you like. When it’s complete, click OK to save it.
5. The main setup is complete. You can click OK to execute it right away, or continue to configure Alerts and Notifications. Once everything is in place, you can right-click the created job, choose Start Job at Step... to test if it works properly. If not, please hit View History from the right-click menu to check for errors.